
Building and Testing the BPE Blog API
In the previous post, we set up authentication using Microsoft Entra ID. At this point, we have enough of the foundation in place to start building out the actual Blog API.
The next step was to generate the domain, data, application, and API layers, then test the API end-to-end locally.
I used the following prompts to generate the initial implementation.
Generating the Domain and Data Layers
let's generate the domain and data layers now

blog post model (inherit from Orbital's Entity class to get id/audit fields)
- Title (string)
- Description (string)
- Publication Info (publication information poco)
- Reading Time (int)
- Tags (readonly list string)
- Content (string)
- Slug (slug poco)

publication information model
- Published Date (nullable)
- Publish Status
+ Unpublished (no date, draft)
+ Published (date time, published)

slug model
+ see the slug model inside of Trakr for inspiration

we'll need to move orbital to the domain project for this, which makes me think I should add an enhancement to separate the optional domain poco to its own library.

the data project should implement the required repository from orbital and expose a dependency injection facade class for the api project to call.
The BlogPost model inherits from Orbital’s Entity class, which gives us the common ID and audit fields without having to redefine them.
I also decided to model publication information and slugs separately rather than putting everything directly on the blog post model.
PublicationInformation is responsible for tracking whether a post has been published and, if so, when it was published.
A new blog post can either be:
Unpublished, with no published date.Published, with a published date.
The slug is also represented by its own model. I already have a slug implementation inside Trakr, so I gave Codex that project as a reference rather than defining the behavior again from scratch.
One thing I noticed while doing this is that Orbital currently includes the optional domain POCO inside the main library. Since I’m now referencing Orbital directly from the domain project, it may make sense to eventually separate that POCO into its own package.
That isn’t required for this project, but it’s something I’ll probably revisit in Orbital later.
The data project implements the repository abstraction provided by Orbital and exposes a dependency injection facade that can be called by the API project.
using Data.BlogPosts;
using Microsoft.Extensions.Configuration;
using Microsoft.Extensions.DependencyInjection;
using Orbital.Extensions.DependencyInjection;

namespace Data;

public static class DataFacade
{
    public static IServiceCollection AddData(
        this IServiceCollection services,
        IConfiguration configuration) =>
        services
            .AddOptions()
            .AddOrbitalDatabaseSettings(configuration, "DatabaseSettings")
            .AddSingleton<BlogPostContainerSettings>()
            .AddCosmosContainer<BlogPostContainer>()
            .AddOrbitalCosmos(options => options.Configuration = configuration);
}
Updating the Tests
Once the initial domain and data implementation looked good, I updated the tests.
this looks good, but let's update the tests - we aren't using AAA comments to structure. let's also use fluent assertions (the last MIT license version) instead of using Assert int he unit tests.Codex didn’t add Arrange, Act, and Assert comments to the tests it generated, so I prompted it to add them.
I generally prefer using the AAA comments to separate the different sections of a test. It’s mostly a style preference, but I find it makes the structure of a test easier to scan when you’re reading through a larger test suite.
I also prefer FluentAssertions over the built-in Assert methods.
For this project, I’m intentionally using the last MIT-licensed version of FluentAssertions.
Generating the Controllers
With the domain, application, and data layers in place, the next step was to expose everything through the API.
let's implement the controllers now.

for controllers, let's use integration tests rather than unit tests.

- Use the CosmosDb Testcontainers library
- If possible, use separate files for controllers but group them under one drop down in Swagger.
For the controllers, I decided to use integration tests rather than unit tests.
There isn’t much value in writing tests that mock the repository and verify that a controller calls a method. I’d rather test the API through the actual ASP.NET Core pipeline and verify that the controller, application layer, repository, serialization, and Cosmos implementation work together.
For Cosmos DB, the tests use Testcontainers so the test environment can run against an actual Cosmos-compatible database rather than mocking the data layer.
It’s here I learned the controllers themselves can live in separate files while still being grouped together under the same section in Swagger using the [Tags] attribute on the controller.
[ApiController]
[Route(BlogPostRoutes.Base)]
[Tags(BlogPostRoutes.SwaggerTag)]
public sealed class CreateBlogPostController(CreateBlogPostService service) : ControllerBase
{
    [HttpPost]
    [ProducesResponseType<BlogPost>(StatusCodes.Status201Created)]
    public async Task<ActionResult<BlogPost>> Create(
        CreateBlogPostApiRequest request,
        CancellationToken cancellationToken)
    {
        var blogPost = await service.ExecuteAsync(
            new CreateBlogPostRequest(
                User.GetUserId(),
                request.Title,
                request.Description,
                request.Tags,
                request.Content),
            cancellationToken);

        return CreatedAtRoute(
            BlogPostRoutes.GetById,
            new { id = blogPost.Id },
            blogPost);
    }
}
At this point, we have a working API.
Now we need to make sure it actually behaves the way we expect.
Testing the API End-to-End
The integration tests verify individual API behaviors, but I also wanted a quick way to exercise the API locally as a complete workflow.
For that, I’m using Postman.
The goal is to create a small test suite that runs requests sequentially:
Authenticate
    ↓
Create Blog Post
    ↓
Get Blog Post
    ↓
Get Blog Posts
    ↓
Delete Blog Post
Swagger already provides us with sample JSON for the POST endpoint, so we’ll use that to create a blog post, retrieve it, list the available posts, and finally delete it.

Creating a Blog Post
The first request in the sequence is straightforward: create a blog post using the JSON provided by Swagger.
While testing this, I noticed the first requirement that I had missed.
The create request allowed the caller to specify the publication status.
That isn’t really what I want.
A newly created blog post should always start as unpublished.
Publishing is a separate domain operation that we’ll implement later.
Allowing the caller to provide the status would mean the client could potentially create something like:
{
  "title": "My Blog Post",
  "publicationInformation": {
    "publishStatus": "Published",
    "publishedDate": "2026-08-26T00:00:00Z"
  }
}
That lets the client control state that the API should own.
Instead, creation should effectively behave like this:
POST /api/blog-posts
        ↓
Create Blog Post
        ↓
PublicationInformation.Unpublished
To fix this, I updated the tests to ensure new blog posts are always created as unpublished, removed publication status from the create request, and set PublicationInformation to Unpublished inside the application.
This is one of the reasons I like doing these end-to-end passes even when integration tests already exist.
The implementation can correctly satisfy the requirements we gave it while the requirements themselves are still incomplete.
And Then We Get a 401
Once the create endpoint was ready, I ran it through Postman.
And, of course, immediately received a 401 Unauthorized.
That’s actually what we want.
In the previous post, we configured the API so that all requests require authentication through Entra ID. Postman now needs to authenticate before it can run the rest of our test suite.
Authenticating Postman with Entra ID
For this local test suite, I’m using the OAuth 2.0 client credentials flow.
This allows Postman to authenticate using an application identity without requiring me to manually log in each time the suite runs.
First, I created a client secret for the BPE Blog API app registration.
Then I created a request to the Entra token endpoint using the following values:
client_id: <<YOUR CLIENT ID>>
scope: <<YOUR API APPLICATION ID URI>>/.default
client_secret: <<YOUR SECRET>>
grant_type: client_credentials
This gives Postman an application-only access token.
The flow looks roughly like this:
Postman
   │
   │ client_id
   │ client_secret
   │
   ▼
Microsoft Entra ID
   │
   │ access_token
   ▼
Postman
   │
   │ Bearer token
   ▼
BPE Blog API
It’s worth calling out that this is intentionally simple and is only being used for local automated testing.
There is no user involved in this flow. Postman is authenticating as the application itself.
The eventual BPE Blog Admin UI will use an interactive Entra login so the API can authorize the actual user.
In a larger application, I would also create a separate app registration specifically for tools like Postman rather than reusing the Blog API’s application identity.
That application could then be given the appropriate application permissions to call the API.
Creating a Postman Environment
Next, we’ll create a Postman environment.
The environment gives us somewhere to store values that need to be reused across multiple requests.

After retrieving the bearer token, I use the following post-response script:
var jsonData = pm.response.json();

if (jsonData.access_token) {
  pm.environment.set("access_token", jsonData.access_token);
  console.log("Access Token:", jsonData.access_token);
} else {
  console.log("Failed to retrieve access token.");
}
This stores the returned token in an environment variable called:
access_tokenFor the rest of the collection, the authorization type can then be configured as Bearer Token using:
{{access_token}}Now the rest of the requests can reuse the token retrieved at the beginning of the test run.
One important detail here is that the client credentials token represents the application, not a user.
When inspecting the JWT, the token doesn’t contain a delegated scp claim because there isn’t a user involved in this authentication flow.
For what we’re doing here, that’s fine. The goal is simply to authenticate the automated Postman test suite against the API.
Passing Data Between Requests
The next thing we need is the ID of the blog post we create.
In the create endpoint, I added another post-response script:
var jsonData = pm.response.json();

if (jsonData) {
  console.log(`Blog post created with ID: ${jsonData.id}`);
  pm.environment.set("id", jsonData.id);
}
When the blog post is created, its ID is saved to the environment.
That means the next request can retrieve the exact post we just created:
https://localhost:7036/api/blog-posts/{{id}}The same value can also be used by the delete request at the end of the test.
This gives us a simple workflow where each request can pass information to the next one.
Running the Test Suite
I also added requests for:
- Get Blog Post
- Get Blog Posts
- Delete Blog Post
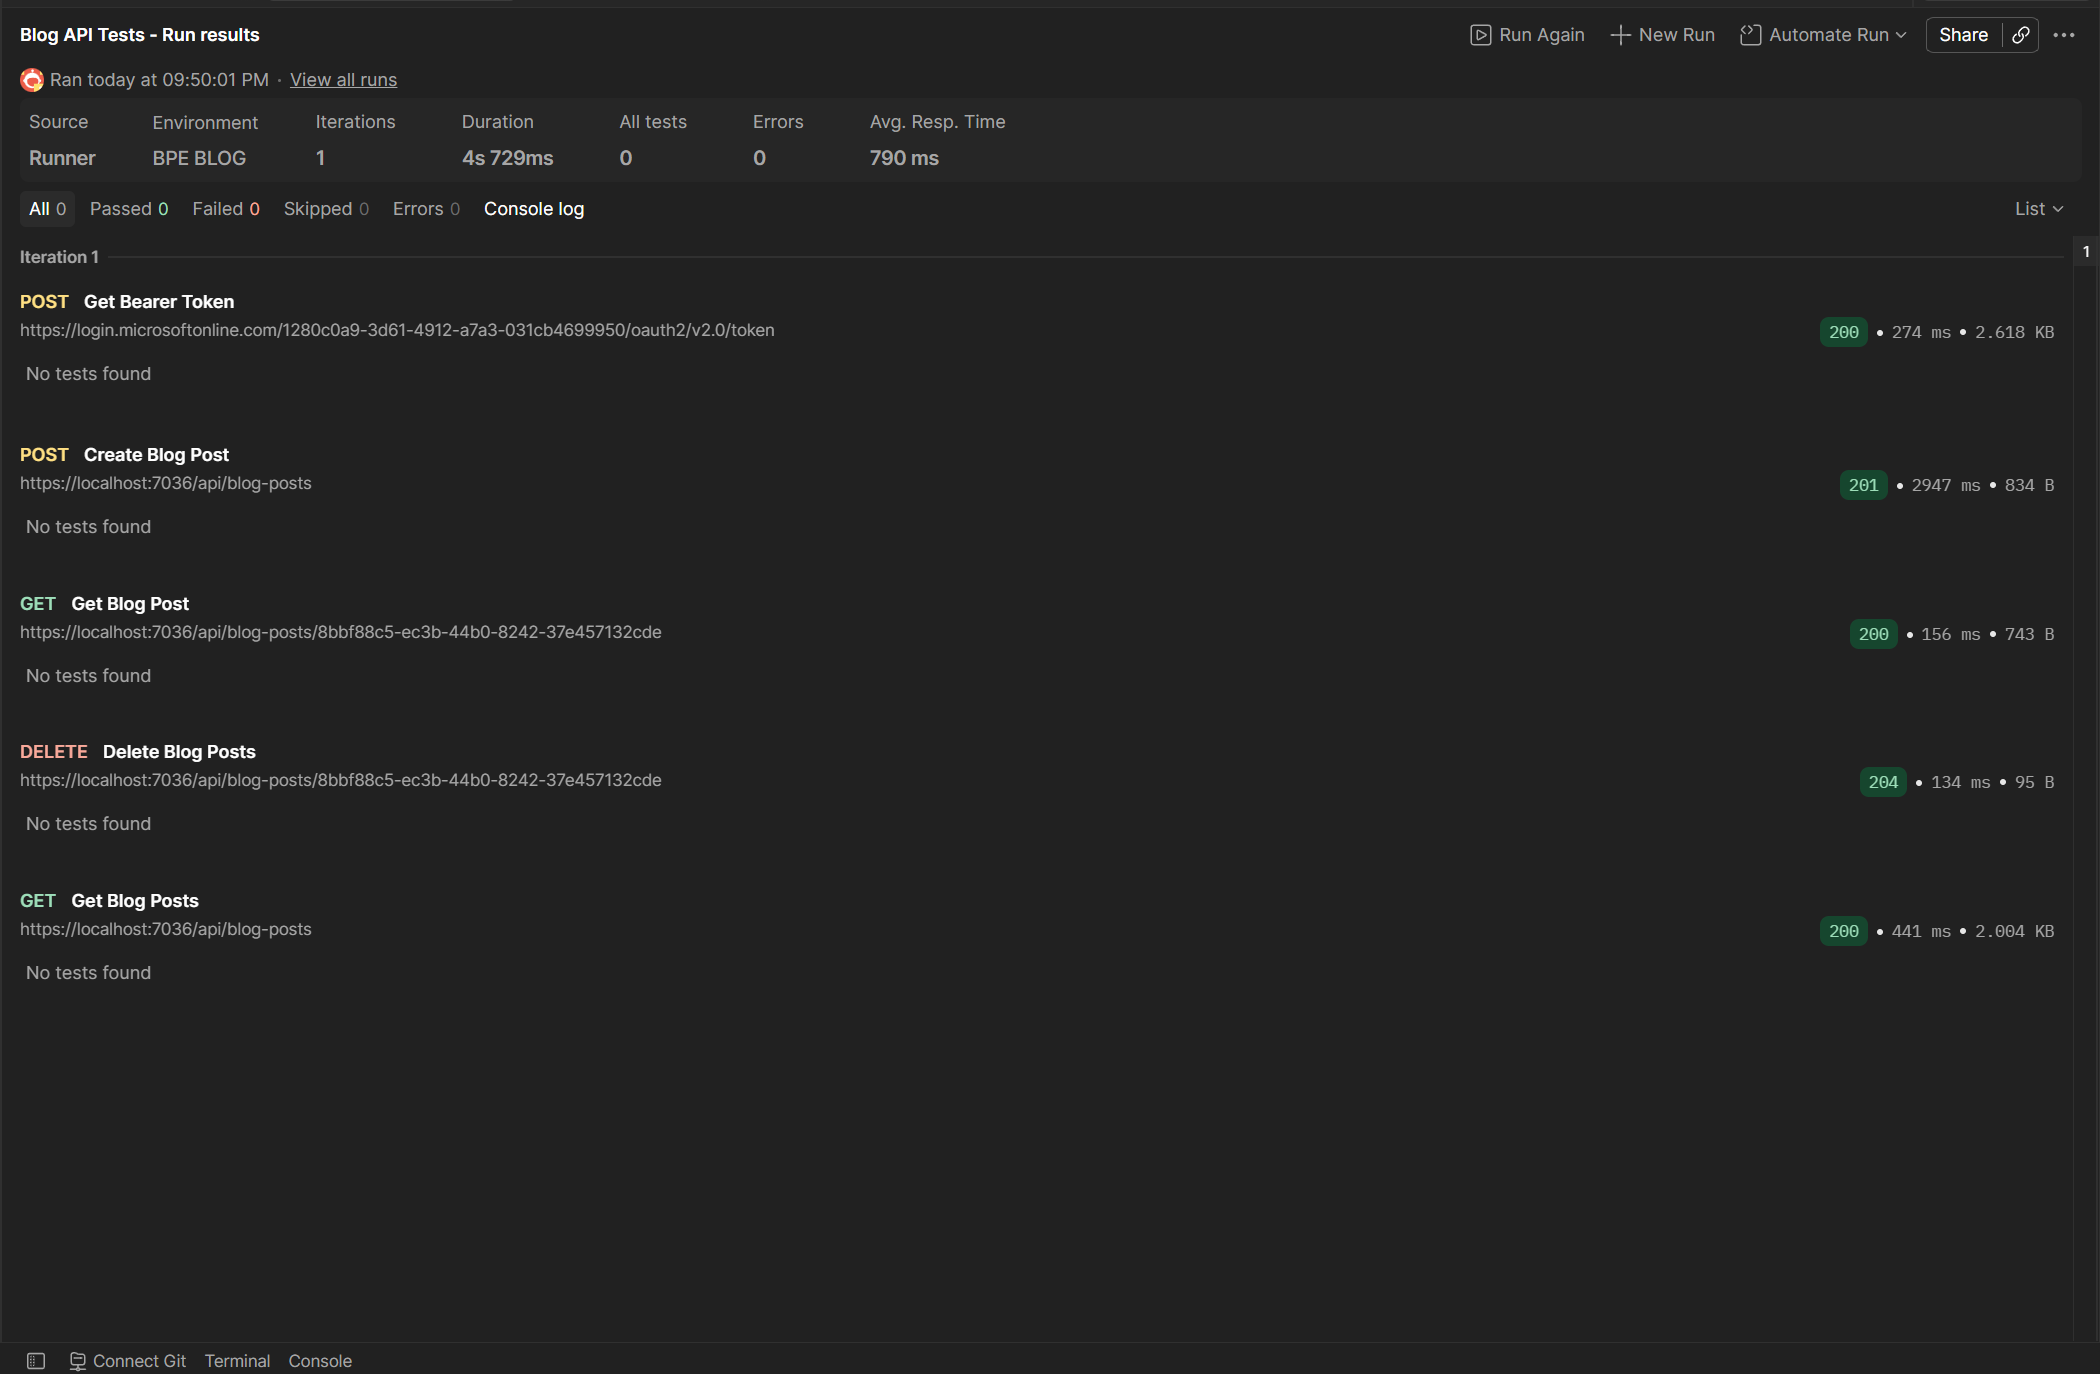
Postman lets us run the collection sequentially, so we can now execute:
Get Bearer Token
        ↓
Create Blog
        ↓
Get Blog
        ↓
Get Blog Posts
        ↓
Delete Blog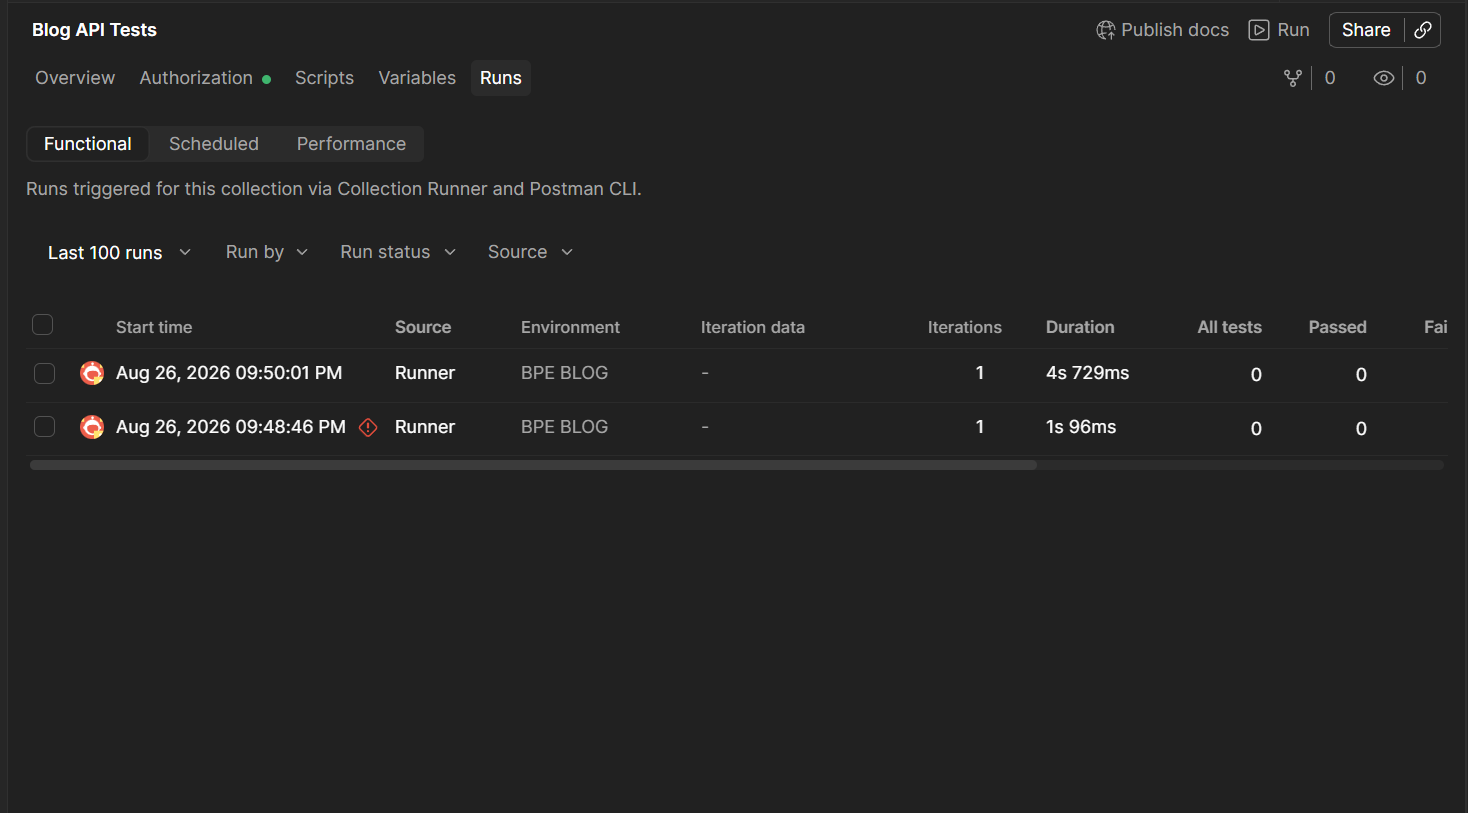
Postman also supports post-response test scripts, so we can add assertions to each request to verify things like:
- Expected HTTP status code.
- Response body exists.
- Created blog post has an ID.
- Retrieved blog post matches the created post.
- Deleted blog post is no longer available.
This isn’t intended to replace the integration test suite.
It’s just a convenient way to run the API locally from the outside and make sure the complete workflow behaves the way I expect.
Another Requirement We Missed
While running the API through Postman, I noticed another issue with the create endpoint.
The request allowed the caller to provide the blog post’s reading time.
Again, that’s information the caller shouldn’t really control.
Reading time is derived from the post content.
Instead of accepting:
{
  "readingTime": 8
}
the API should calculate it itself:
Content
   ↓
Word Count
   ↓
Reading Time
I prompted Codex to remove ReadingTime from the create request and calculate it based on the contents of the blog post.
The current implementation assumes an average reading speed of 200 words per minute.
This is another case where the client doesn’t really need to provide the value. It already gives us the content, so the API has everything it needs to calculate the reading time itself.
It’s similar to the publication status issue: both were values I initially exposed on the request that the API could determine on its own.
The client shouldn’t decide that a newly created blog post is published, and it doesn’t need to decide how long the post takes to read.
Generated Code Still Needs Review
These two issues are also a good example of where AI-assisted development still requires engineering judgment.
The generated implementation wasn’t necessarily wrong.
It implemented the model I originally described.
The problem was that my original requirements allowed two things they probably shouldn’t have:
CreateBlogPostRequest
    ├── Publication Status   ← shouldn't be caller-controlled
    └── Reading Time         ← shouldn't be caller-controlled
Testing the complete workflow exposed both.
So the development loop here isn’t really:
Prompt
  ↓
Generated Code
  ↓
Done
It’s closer to:
Intent
  ↓
Prompt
  ↓
Generated Implementation
  ↓
Automated Tests
  ↓
End-to-End Testing
  ↓
Find Missing Requirement
  ↓
Refine Implementation
Codex can generate a lot of the implementation quickly, but I still need to decide whether the resulting API actually represents the behavior I want.
What’s Next
At this point, we have:
- The domain layer.
- The application layer.
- Cosmos DB persistence.
- The API controllers.
- Integration tests.
- Entra authentication.
- A small Postman end-to-end test suite.
The next step is to generate the UI that will use this API and create the CI/CD pipeline so the application can be deployed automatically.
After that, we’ll come back to the API and design the update and publishing endpoints.
Publishing is intentionally being treated as a separate operation from creating a blog post, which will give us a few more interesting domain and API design decisions to work through.